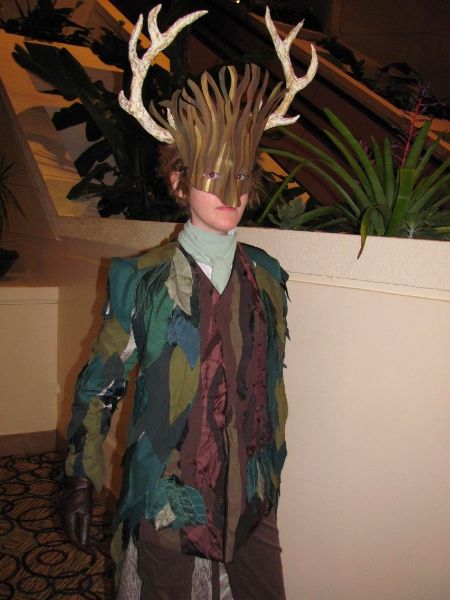
Still playing catch up, but hopefully some new projects will make their way in sometime soon. So I posted
this pic in my year cos review, but didn’t really talk about it:

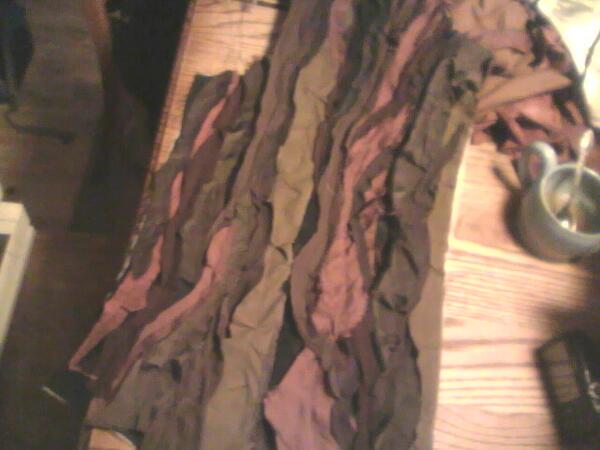
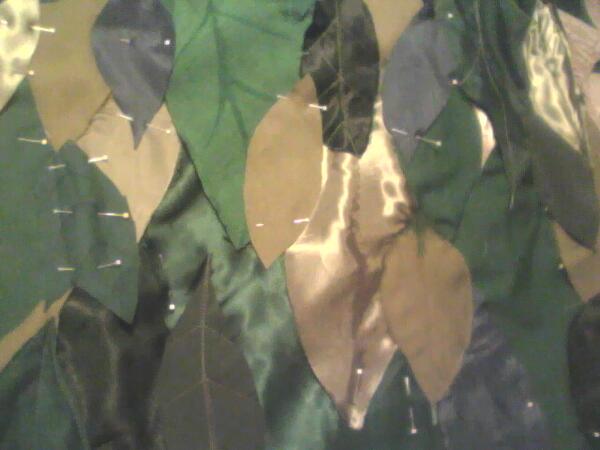
(Photo by Chris Erickson) I talked about progress on the jacket and waistcoat here, and basically did more of the same until it was in a wearable state.
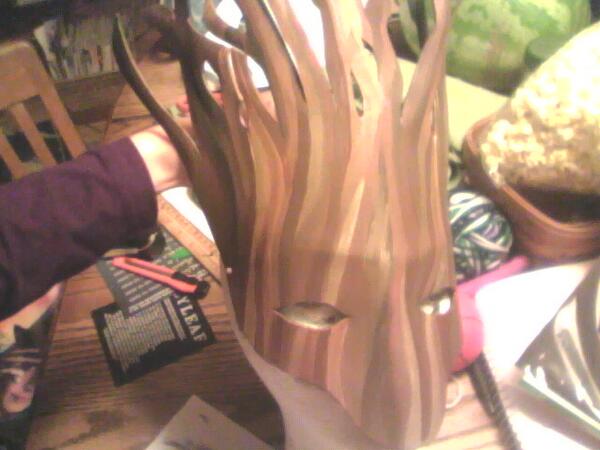
But I never posted about the horns and mask, so I’ll do that! And a few more pics from the event.

I started with forming the loose shape of the horns with aluminum foil, after looking at some pictures of antlers. Once I had a shape I liked I wrapped the foil in masking tape.

The next morning I discovered that masking tape was old D: and peeling away.

So I glued all the peely bits down and also coated the whole antler in a few layers of plain elmer’s glue.

Then I covered the whole thing in paper pulp, which is basically paper mache, but… pulped. I used that because I had it already 8D And it was sandable, which I thought could be useful.

Okay so the package did say there would be some shrinkage, but there was a LOT of shrinkage!

I ended up doing another layer or two, trying to really slather it on. That seems to be the end of my progress pics of the antlers. So after it was all dry, I had slathered sooo much pulp on, they were pretty lumpy 8D;;
So I did file and sand them, but in the interest of time and laziness, decided not to get them smooth. And instead I dry brushed them with metallic gold.
For the mask I started out with a sheet of green craft foam.

And drew a rough mask shape on it, free hand (which is why one side is much taller than the other… but I’m gonna write that off as “artistic”). I roughly shaped it using a hair dryer, putting the nose ridge and brow ridge in, and semi shaping the “branches.”

Then I painted the whole thing, front and back, with a mixture of black and gold paint as a base. And then I just took a variety of brown paints I had on hand and started painting streaks, mixing colours as I went.

I just kept going until I liked how it looked.
There’s a cell pic I posted earlier, which is basically how it turned out.
To finish it off I glued it to a plastic store bought mask I had, because I realized the foam would tear where the holes/ribbons are. Then Convolution!

Judy used her Regency dress and added wings and a fabulous headdress and I love it!
With flash~

Judy wasn’t keen on how her wings had turned out, and literally threw them away on the way out!

Then a wild Mette found them 8D I don’t know.
Aaaaanyway, I definitely still consider this costume a Work In Progress! I have grand plans for it, and am thinking about returning to it soon…